Submitted by owner on
Flying toys manufactured by company Silverlit are simple in terms of design and suitable for children from 5-6 years for introductory familiarizing themselves with RC flying. The X-Twin two-engined series has functionally simpler control models: the performance of engines governs the climb/descent rate and the difference between the performance of the left and right engine ensures “turning”. The model does not need any mechanically controlled elements (i. e. no servos) and all the electronics on the plane fits into a 10 cm3 (receiver and electronic speed controller including LiPo battery). For simplification in design is paid with worse flight characteristics than has more mature models: the flight of the X-Twin is typically “swinging” and when turning it is necessary to expect slightly delayed reactions. The pilot however can with the low acquisition costs of transmitter and equipped model learn how to control the object in 3D space, which is the largest benefit.
The basic building material of most X-Twins is almost indestructible EPP foam. The cracks can be repaired with cyanoacrylate glue and accelator. Another type of foam is used by X-Twins from DIY category. These are much sensitives and destroying it is not a big problem. After crushing aircraft’s construction electronics (motors and control unit) usually will survive without damage. Then we “recycle” just the electronics with minimal cost and we will build a wing Crazy chicken (Dizzy Chick).
Building materials:
- EPP foam board with thickness of 3 mm (underlayment of the floating floor made of EPS foam, depron, Extrupor, etc.)
- A4 sheets of paper for templates (common copy paper is sufficient, but better is paper a little heavier)
- dispersion glue (Druchema Hercules) for gluing paper templates of dihedral
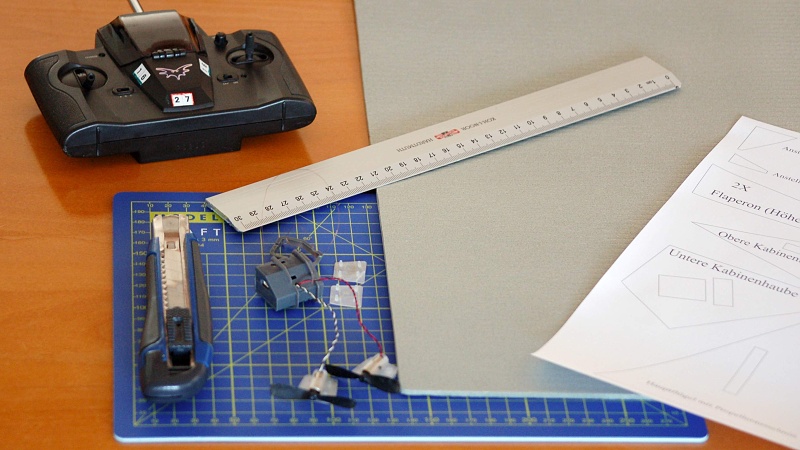
- electronics from Silverlit’s X-Twin model (transmitter, 2 engines, control unit)
- double-sided adhesive tape 3M (a piece 1.5 x 2 cm / 0.6" x 0,8" will be enough)
- self-adhesive glass fibre tape (width 2.5 cm / 1", usage 50 cm / 20")
- according to the chosen board type either thin CA glue, or glue Purex Rapid (or two-component 5min epoxy)
Tools:
- cutter (snap off knife, scalpel)
- cutting mat
- metal ruler
- felt tip pen (soft pencil)
Building instructions:
-
From the printed plan we cut the template for the wings, the upper and lower part of the fuselage, the winglets.
The most appropriate paper for plan print is paper with bigger grammage (at least 160 g/m2).
We cut on the mat with metal ruler.
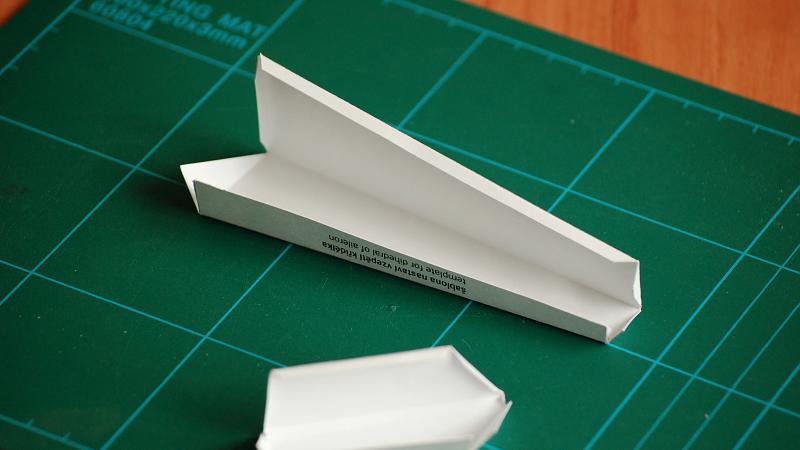
The templates for the support of ailerons and winglets we paste together as shown. The base must be flat and the template not twisted, in order we gluing with a thin layer of dispersed adhesive.
-
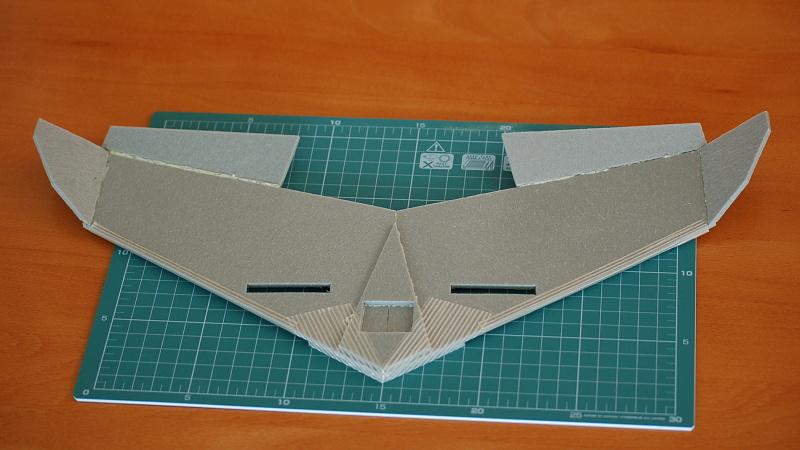
We trace according template two wings on selected foam plate, also two winglets, two ailerons, one lower and one upper part of the fuselage.
Some foam materials are difficult to tag with the felt-tip pen. Softer materials is possible to cut directly according templates and a metal ruler.
The cheapest foam material you can get in the hobby shops or floor stores, where is sold under different brands as the underlayment for the floating floors (Arbiton Secura, IZO-Flor, etc.). In local stores for modellers you can get a better (and more expensive) materials as of depron and EPP.
The density of the chosen material should ensure the flight weight of 18 — 20 grams.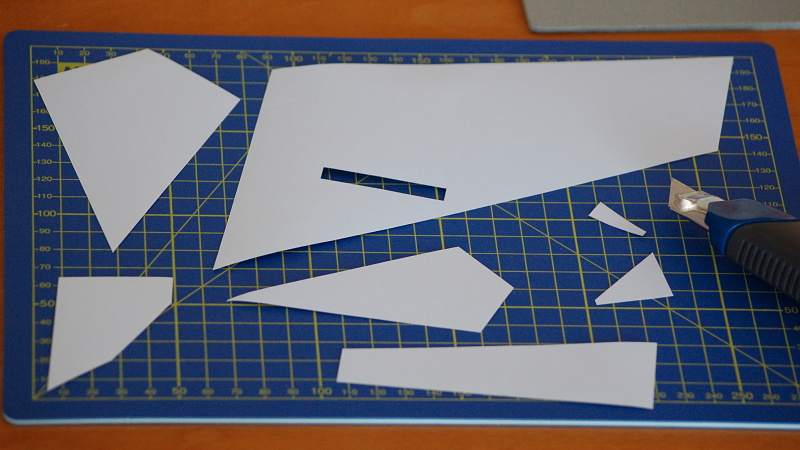
- With sharp cutter we cut on the cutting mat with the metal ruler all parts of the aircraft. Gluing will be easier with correctly shaving off edges of winglets and ailerons.
The templates from the plan are used to shaving off the edges under the right angle. When gluing are finished templates used as pads for winglets and ailerons.
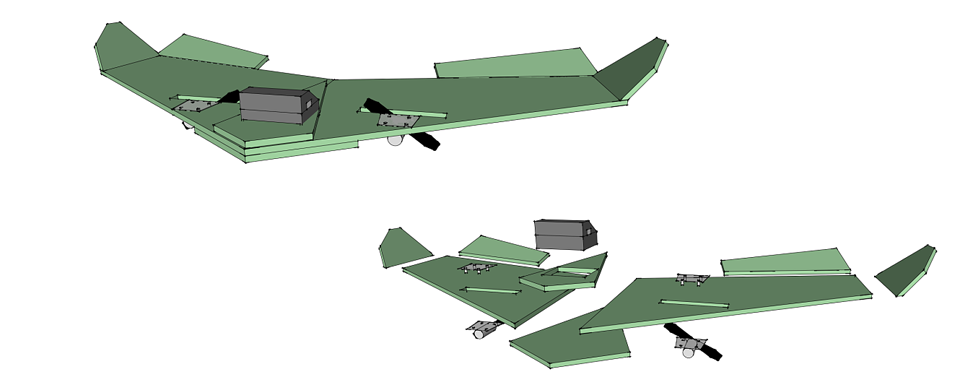
In the upper part of the fuselage is hinted the hole for the control unit of the model Aero Silverlit DIY System Basic Set (GS10962). If you use a different combination of the control unit/engines, before the establishment of the control unit is needed to determine the correct position of the Centre of gravity (see plan).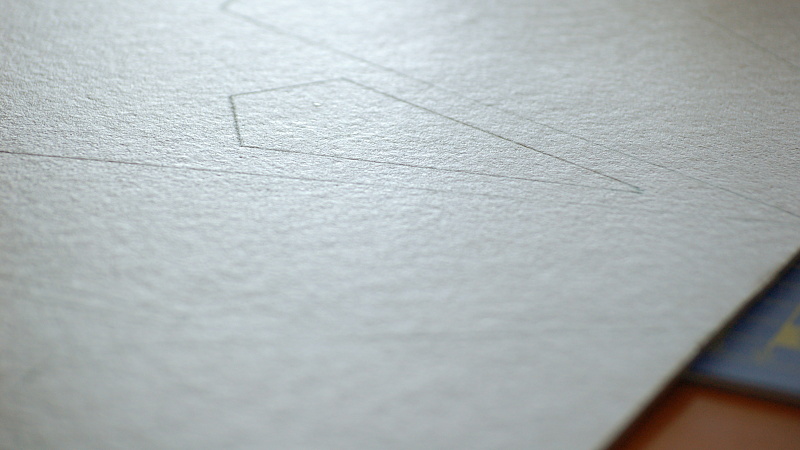
- We gluing individual parts. We pay attention to the correct geometry, the model we gluing on a flat surface.
The glue we choose according to the type of material. For the EPP is suitable thin cyanoacrylate adhesive splashed with accelerator. For other materials is well usable Purex Rapid or 5min epoxy.
Lifetime period of the model lengthens self-adhesive tape with glass fibres attached on the leading edge of the wing. For the cracks are especially tender the thinnest parts of wing at the openings for propellers.
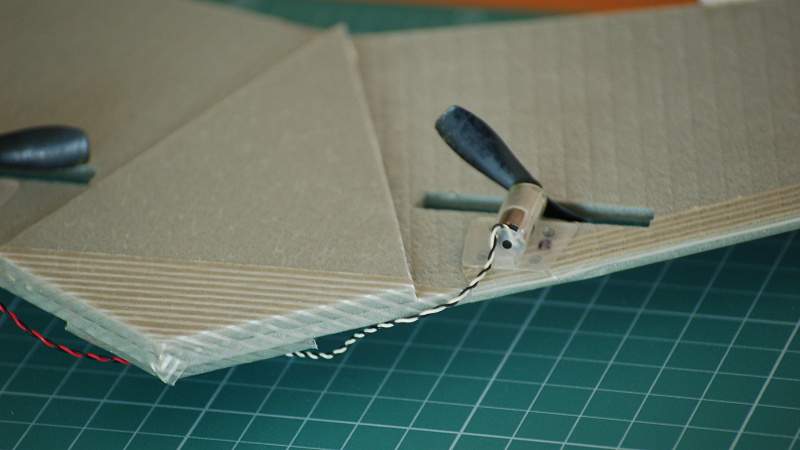
- The control unit we put into the slot in the upper part of the fuselage and secure it with double-sided adhesive tape. The engines we snap under the wing. We charge the battery, wait for calm weather and we can fly.
If you use a different control unit/engines than for which is the plan ready (Silverlit DIY Aero System Basic Set) , you need to determine where to place the control unit so that the Centre of gravity position match the plan. At the level of the Centre of gravity you put the fingers and you can change the location of the control unit on top of the wing so that the model remained in the balance on your fingers.Published also 7th June 2015 on Táta Geek.cz.
- With sharp cutter we cut on the cutting mat with the metal ruler all parts of the aircraft. Gluing will be easier with correctly shaving off edges of winglets and ailerons.
